
Bias lighting is backlighting behind a TV or computer screen and is used to reduce the strain on your eyes. If your eyes have ever felt tired after staring at a bright TV, computer, or cellphone screen, it’s because you have literally exhausted them. Staring at a bright screen while you’re in a dark or dimly lit room can have a major impact on how your eyes operate and how your muscles are used.
Your eyes constantly work to find the perfect balance between light and dark. Pupils constrict and dilate to control how much light reaches your retinas, and how much they dilate depends on your entire field of view. So, when all you see are constantly changing levels of brightness surrounded by darkness, your eyes can become overworked as they try to adjust. This can result in dryness of the eyes, tiredness, headaches, and ocular migraines. Adding TV backlighting can help establish a sort of baseline so that your eyes don’t have to adjust so dramatically.
Location Location Location!

Although any light will help alleviate the strain on your eyes while looking at a screen, there is a right and wrong type and location for the light to have the best effect. As mentioned earlier, bias lighting is placed behind your screen to establish a brighter field of view so that your eyes aren’t constantly trying to find a balance between light and dark. Bias lighting illuminates a room without creating glare or reflections on your screen, shining directly in your eyes, or affecting how you see contrast and colors. Other sources of light, such as ceiling lights or lamps, can do all of the above.
If light is shining onto your screen, there’s going to be a noticeable difference in how the picture appears. Colors won’t be as vivid, and the screen might be hazy. In an attempt to remedy the situation, you could adjust the brightness and contrast. However, these adjustments will decrease the life span of the bulb or LEDs in your screen. The adjustments will also result in increased energy consumption along with a higher electric bill.
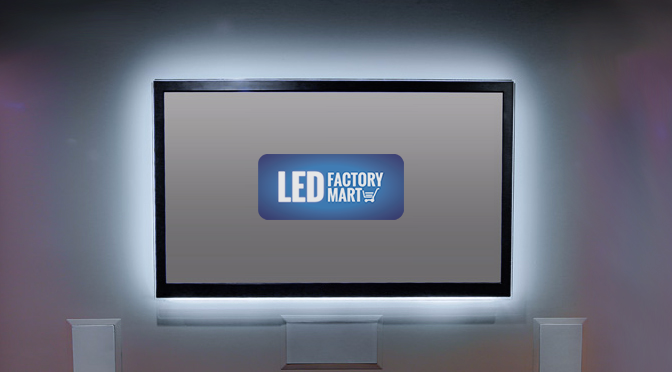
Adding light behind your screen instead of in front of it will eliminate any color or contrast issues. Dark scenes or colors will look richer against a white illuminated background. The picture below demonstrates how dark colors are lost against a dark background.

Choosing the Right Bias Lights
While there are many options to use for TV backlighting, we recommend LED strips lights. Peel-and-stick backings allow for easy installation. You can control their brightness, and the correct color temperatures and CRIs are available.
According to Jason Fitzpatrick at howtogeek.com, “.. you want a bulb temperature that is as close as possible (if not identical) to the reference point used in the industry that both manufactures the screens you’re looking at as well as creates content for said screens and that’s 6500K.” He goes on to say that, “The bulbs (be they CFL or LED) inside your HDTV or monitor are calibrated to 6500K, the film and digital video shot is color corrected to have a 6500K white reference point, and the editing suites where content is edited and worked on have 6500K bias light.”
So what exactly does 6500K mean? Correlated color temperature (CCT) will tell you what hue and tone of white to expect from a specific bulb or LED. CCT is measured in Kelvin (K), which is similar to degrees in Celsius. Different temperatures on the Kelvin scale represent different colors. For example, light at 2000K-3500K looks more orange/yellow and is called ultra warm or warm white, and as temperature increases in Kelvin, color changes to more of a “paper white” known as natural or neutral white (between 3500K and 5100K) and finally into a bluish-white known as cool white (5100K-20000K). Therefore, TVs or monitors with 6500K lights will emit cool white illumination.


How to Install LED Strip Lights
Most of the strip lights available have peel-and-stick adhesive backings and can be cut or ordered in lengths to fit every screen size; strips are marked with designated cut lines. If you don’t order a kit, you will need a power supply and can purchase a controller with remote for dimming.
An easy installation method is to use a continuous length of strip around the back of your screen. For a cleaner look, you can cut the strips at all four corners of your screen. If you plan on cutting your LED strip lights, you will need 4 connectors. The following instructions explain how to install LED strip lights by cutting them into sections. Note that installation methods will differ depending on the strip you choose to get.
1. Cut your LED strip lights into lengths that fit the back of your screen. Because strip are available in different lengths, you might be able to order separate strips that will fit all four sides of your screen.

2. Peel away the protective paper from one end of the strip, and attach a connector.

3. Adhere the strip to the back of your screen. The opposite end will have a connector (pigtail, LC2, etc.) for attaching to a power supply. For this project, it’s best to use a 12- or 24-volt desktop power supply—whichever matches the voltage of your strips. Use wire nuts and electrical tape for pigtail connections.
If you will be using a controller for dimming, connect your strip to the controller, and connect the controller to the power supply.
4. Connect the next section of strip to the open end of the connector, and place a connector on the other end of that strip. Repeat this process for the third strip. The fourth strip will complete your bias lighting system and requires no connection on the end that meets the first installed strip.
If you have any questions, recommendations or suggestions please don’t hesitate to comment down below and let us know!